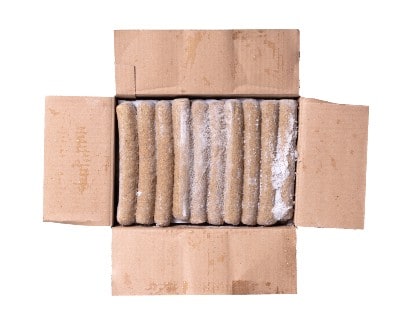
When traveling by plane, it is important to make sure that all food and beverages are properly packed before boarding. This includes frozen foods like frozen meals, catch from a fishing trip, etc. If you don’t pack them correctly, they may melt during flight, which could cause a mess. Here are some tips on how to travel with frozen food on a plane.
Table of Contents
Can I Take Frozen Food in my Carry On?
The Transportation Security Administration (TSA) does allow passengers to take solid foods on airplanes so long as they are traveling within the United States and packaged according to safety standards. Learning how to pack frozen foods for your enjoyment back home is a great way to experience cuisines from your favorite spots or stock up on items you can’t pass up on while traveling.
Like with all foods, keeping it packed properly is key to ensuring that it’s kept at a safe temperature and shielded from potential contaminations. Below, we’ll discuss how to travel with frozen food on a plane and how you can take them along with you on your flight back home. We also go into whether you can fly with fresh fruit and how to do it if so.
Can I Pack Frozen Food in my Checked Luggage?
TSA does allow frozen foods in checked luggage. This includes foods like meat, seafood, and vegetables, all of which are allowed to fly domestically within the US.
As long as your meat is properly packed, there should be no issue, though you also have to consider keeping it at a safe temperature. To keep frozen meats frozen, it’s recommended to pack them in a cooler and add ice packs or dry ice.
Before we go any further, here is a funny story from the TSA about someone not packing their raw chicken properly. It ended up out of its container and circling on a baggage carousel!
Can You Take Ice Packs on a Plane?
Speaking of ice and ice packs, they are allowed on flights though there are some strict restrictions on them. For instance, they must be frozen at the time of check-in. Any sign of melting or additional liquid within the cooler or container will not be allowed, which is something that passengers should take into consideration.
There are several different types of travel ice packs for food, including gel packs, reusable ice cubes, and ice packs. All of them have their pros and cons, though the rules for taking them on your flight in a carry on are much the same. They must all be frozen when passing through security and cannot be melted or slushy.
Ice Pack In Carry On
Passengers can take ice packs onto planes with carry-on luggage, though they will have to ensure that a few things run smoothly when doing so. For instance, ice packs that are larger than 3.4 ounces (or 100 ml) not only need to be frozen from the time of arrival but must remain so until after security checks.
There is a way that passengers can get around this rule, as it’s difficult to keep ice within your carry on solid for an extended period of time. To take an ice pack on a plane, passengers can surround it with other Ziploc bags filled with ice in their frozen food travel bag. Just before you reach the security line at the airport, you can throw away just the ice in the Ziploc bags. This will keep ice packs frozen solid at least until you pass TSA inspection.
Passengers should note that you can take several ice or gel packs that are 3.4 ounces or under in their carry on bag or lunch pail if they all fit inside a single quart-sized Ziploc bag. If you do this, they don’t need to be frozen when going through security and the whole bag will be treated like a 3-1-1 rule liquids bag. This will only work if you need to take just a small amount of food that needs to be kept cold and only if you’re not taking any other liquids with you.
If you don’t want to bother with ice packs and can’t stick to smaller ones, thin freezer packs that don’t require ice are the way to go. You simply place them in your freezer at home for at least 25 minutes and they’ll be icy cold and ready for you to pack in your cooler along with the food. Since they don’t melt, they’re safe to take through security.
There is one exception to the frozen ice pack rule. You do not need to have a frozen gel pack or an ice pack at the checkpoint if you are bringing them to cool breast milk, baby formula, or juice. The same goes for medicines that need to be kept at a recommended lower temperature. The Cooler Shock Reusable Ice Packs are very popular with mothers who need to travel with frozen breastmilk.
In Checked Luggage
For frozen foods that passengers would like to take back with them after their travels, it’s recommended to keep them at a safe temperature. Passengers can do so by checking their frozen foods instead of carrying them on, doing so as a way to avoid the liquids rule restrictions.
Passengers can take frozen foods with them in their checked luggage, doing so will allow them to pack ice packs in with their meat without worrying about anything else. Even if ice packs are partially melted, there are no restrictions on TSA allowing them to pass through as long as the cooler that contains them is sealed properly to prevent leaks.
Those that are traveling for more than a few hours or who are flying with temperature-sensitive foods like meat should consider checking in their bags instead of carrying them on. A TSA-approved cooler or another appropriate container is permitted when checking in bags, which passengers can use to pack their frozen foods and ice packs.
Will an Ice Pack Explode on a Plane?
When it comes to liquids, TSA has restrictions in place due to the differences in pressure that could lead to an explosion. That is why they are strict when it comes to certain packages and materials, ensuring that there are no drastic changes in pressure that could cause an explosion.
Ice packs, including gel packs, are allowed on both checked bags and carry-on bags, though there is a restriction when it comes to having them frozen when carrying on. As per TSA law, ice packs are allowed and will not explode on a plane if properly packed.
How to Pack Frozen Food for Airplane Travel
When it comes to taking frozen food on a plane, passengers can do so safely by following a few simple steps. There is no limit to the types of frozen foods, including meats, seafood, vegetables, and more. To pack frozen food correctly and safely as checked baggage, follow these simple steps.
What You’ll Need:
How to Pack Frozen Food in Checked Luggage
- Clean Out your Cooler
First thing’s first, you’ll need to start off with a clean cooler. This will also give you the opportunity to test it out, making sure that there are no cracks that allow spillage. Wipe down the cooler with disinfectant and allow it to air dry completely before moving on to the next steps. - Line your Cooler
Lining your cooler will help control the temperature and help keep things nice and organized for the duration of the trip. One of the best materials for that is newspaper, which is made with thicker paper that’s perfect for packing frozen foods.Add about half an inch of newspaper around the bottom and the sides of the cooler. This will not only keep things nice and neat but also absorb any moisture and/or condensation that results from melting.
- Ziplock Frozen Foods
To ensure that your foods are sealed away from contaminants and that leakage is kept to a minimum, it’s recommended to seal them in Ziplock bags. Make sure that the bags you purchase are high quality and sturdy so that foods and luggage are protected. - Add Ice Packs
With your cooler and your foods prepared, it’s time to start packing up your cooler. To do so, start adding frozen ice packs along the bottom, filling them up so that foods remain at the proper temperature.Pro Tip: To keep liquid or moisture from leaking out due to melting, add ice packs to Ziplock bags as well. This will collect any liquid and keep the temperature regulated throughout your travels.
- Add Foods
Start adding foods into the cooler. Be sure to leave some space at the top so that you can add more ice packs, keeping the temperature colder all around. To keep things from sliding around, pack in food tight to prevent moving and sliding that could raise the temperature and result in faster melting. - Fill It In
Fill the cooler in with ice packs, making sure that everything is tightly packed and ice packs are both on top and on the bottom. Adding a few within will also help keep foods from moving around. - Wrap It Up
Place the lid of the cooler on top and make sure that it shuts properly. With the lid on, wrap the cooler with bungee cords all around, making sure that everything is secure and that nothing slips. Bungee cords are great for keeping luggage safe in other ways too.Pro Tip: Do a quick test run and carry it as you would into the airport making sure that everything stays in place.

How to Pack Frozen Food With Dry Ice
Another option to take frozen foods on a plane is doing so with dry ice. Dry ice is permitted on planes so long as it is packed in a cooler that’s ventilated so that carbon dioxide can escape instead of building up inside. It should also be labeled as such. We go into more detail about packing and flying with dry ice on a plane in a later article, but are here the simple steps involved.
- Buying Dry Ice
According to TSA, dry ice is allowed as long as it’s less than 5.5 pounds (2.5 kg). It’s recommended to get the dry ice as close to departure time as possible, packing it up and taking off for check-in. - Insulate Cooler
Line the ventilated cooler with newspaper and add dry ice on top. - Add Foods
Add foods into the cooler and make sure they’re packed in tight. - Fill In with Dry Ice
Fill in gaps and top off with dry ice, placing the lid on top to ensure that foods are kept cool. - Wrap It Up and Go
Wrap cords around the cooler and make sure that the lid is sealed so that check-in is smooth.


