
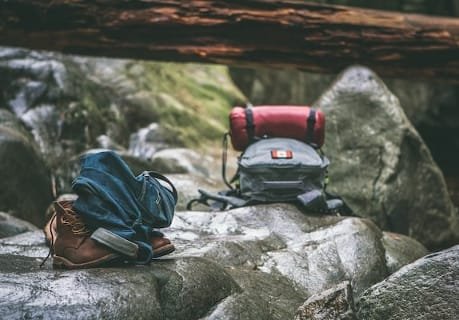
Camping can be a great trip to enjoy with friends or family. A true wilderness experience. But of course, there are a couple of obvious things to take with you, namely, your sleeping bag. While your whole sleeping system would likely fit into your hiking backpack, there are some cases where it wouldn’t be an option or favorable at all. Attaching your sleeping bag to your backpack is another way to carry it, and it doesn’t need to be a difficult task. If you’re looking forward to a camping trip or multi-day outdoor trip but don’t know how to attach a sleeping bag to a backpack or whether you can stuff it into your backpack, then you’re sure to find a solution and more through this article.
Advantages of Packing Your Sleeping Bag Inside Your Backpack
Packing a sleeping bag inside a backpack is very common even among pro hikers and backpackers. But this mainly depends on the type of bag you’re carrying and how long your trip may be. If your bag is built to hold 40L worth of items or more, then it is possible. If you’re looking to know how to pack a sleeping bag inside a backpack, there will be more to this shortly. But for now, let’s break down the advantages of carrying a sleeping bag inside a backpack.
The biggest reason for this packing method is to secure your sleeping bag against the many elements of nature. Keeping it inside your bag will keep it from getting wet in case of sudden rain, and may also last longer if it is away from harsh sunlight. This is probably the biggest advantage you’ll get out of packing it inside that you won’t get if it is attached outside your backpack.
Keeping it inside also makes it easier and less risky to carry it through bushy terrain. Your bag is less likely to get snagged on anything and gives you a little more centered stability as you walk or climb. This would not be the case if it were strapped on the outside.
Another significant advantage is it’s really easy to stuff a sleeping bag inside your pack. It doesn’t take long, it’s not a complex task at all, and most importantly, it’s very easy to distribute the weight evenly and have it centered. However, in some cases, a sleeping bag may be too big for a backpack, which is where the benefits of attaching a sleeping bag to the outside of your pack take over.
Advantages of Attaching Your Sleeping Bag to the Outside of Your Backpack
If you have a sleeping bag too big for a backpack, you can always attach the sleeping bag to your pack. Rolling up a sleeping bag and keeping it at the bottom of the main compartment may be more comfortable for some, but it will definitely take up a good amount of space, which you might instead want to utilize to pack other essential gear, depending on the length of your journey, of course.
On top of saving space, you might also be saving your back from much strain. While this depends on what’s in your main pack compartment, attaching a sleeping bag to the outside of your pack might help with weight distribution if it’s strapped well and doesn’t lean too much to the left or right. However, some may find the correct position difficult to achieve. If it’s attached too low on the bag, it could swing a lot as you walk, or get wet if you’re on a slushy path. But, some may not find this to be a problem when it is in a stuff sack or small waterproof duffel bag that is attached to the pack.
Another major benefit to keeping it on the outside is easy access to your sleeping bag. If you find a good spot during the day to get some rest, it’s easy to take it off your pack and open it up. If it’s stuffed at the bottom of your pack, you would have to virtually unpack entirely to get to your sleeping bag.
How to Pack Your Sleeping Bag in Your Backpack
When it comes to packing a sleeping bag inside a pack, there are a couple of different ways to do it. Whether it be in your main compartment or a dedicated sleeping bag compartment, there are particular ways to pack it in so that you don’t face any issues later while carrying the pack on your back.
The first place that comes to mind for a sleeping bag is at the bottom of the main backpack compartment. This is a very common space to store it mainly due to the type of backpack most people carry around, an internal frame backpack. But why is it at the bottom? While there’s a lot to talk about when it comes to packing a backpack, tThe reason behind packing a sleeping bag at the bottom of an internal frame backpack is very simple; to provide comfort for your lower back and even weight distribution.
Your whole sleeping kit can be placed at the bottom since it is something that you won’t require until you reach the camp and get ready for bed. There are specific ways to pack your sleeping bag to protect it from water and dampness, to better utilize the bag’s space, and to have it be easy to stuff inside.
Use the Separate Sleeping Bag Compartment if There is One
Today, most camping packs come with a separate bottom zipped compartment designed specifically to hold a sleeping bag. Some packs may come with a removable divider, separating the sleeping bag compartment from the main one so that if you don’t need a sleeping bag, you can utilize all the space for your other gear.
Packing the sleeping bag is quite simple. Make sure that it is placed at the center of the compartment and zipped completely. This compartment allows for easy access to the sleeping bag without having to unpack entirely or move other items around. A camping backpack with a sleeping bag compartment, in particular, has one notable benefit; much more space in the main compartment for other items.
However, some might not find this compartment useful without having the sleeping bag in a stuff sack first. The convenience of this compartment also may not be required by many, mainly because it’s generally only required once a day, at the end of the day. The separate compartment may add a little too much bulk to the pack. If you’re an avid hiker, then you might want a very light pack with only one main compartment and a couple of side ones.
Use a Separate Compression Stuff Sac
While there are different compression sacks and cubes available for different hiking accessories, there are compression stuff sacks that are meant solely for sleeping bags. A compression stuff sack or compression dry bag is commonly used to cover and protect your sleeping bag from water and compress your sleeping bag, to preserve space. All you need to do is roll up your sleeping bag and stuff it into the stuff sack. Then, using the attached straps, cinch it down to compress your sleeping bag. This sack can then be stuffed into your sleeping bag compartment or even into the main compartment.

This is an efficient way to protect your sleeping bag from any of nature’s elements, primarily due to its waterproof material. Stuff sacks of this kind are also fairly easy to find. However, there is one problem some might face with this way of packing. Once the sleeping bag is stuffed into the sack, you’re left with an oddly shaped item that may not fit into your bag well and may bulge out of your bag.
Since a sleeping bag is usually one contained item, it may be better to line your backpack’s main compartment with a bag liner. Bag liners are waterproof, and most can be rolled and sealed at the top to prevent any water from getting to your items. This way, you can pack a sleeping bag without a stuff sack. A liner won’t be very heavy and is often the most preferred way to protect not only a backpack but all items in the main compartment. A DIY way of lining your bag instead of buying a pack liner, is to place a large garbage bag into the compartment, but you will have to switch out the garbage bag for a fresh one per use.
Attaching Your Sleeping Bag to the Exterior of the Pack
Now, moving on to the final way to carry a sleeping bag, by attaching it to the exterior of the pack. Though packing it on the outside may seem tedious, there are many methods to attaching your sleeping bag. By using your backpack’s many straps in the following ways, you won’t face any issues when fastening your sleeping bag.
Strap it Under the Lid for an Internal Frame Pack
Before you get down to using the straps, you could first try fastening your sleeping bag to the top flap, or lid, of the pack. This should be the last item to be packed after the main compartment is filled and zipped up. The lid is mainly meant to cover the main compartment and contains a pocket to store essential items that need easy access. But strapping a sleeping bag between the lid and the top of the main compartment is an easy way to pack it securely and buckle it down well using the lid’s straps. It will also keep the weight centered at the top. However, if the lid’s pocket is filled up, you may not be able to store your sleeping bag in this spot.
Compression Straps for Sleeping Bag
Almost all hiking backpacks will have compression straps. But it’s important you know where these straps are located if you are using them to strap in a sleeping bag. Though these are used to compress your bag when it’s very full, you can loosen the straps and slide in your sleeping bag. Once you’ve slid it in, tighten them properly to secure it in place. When it comes to the position of the straps, it’s best to have a bag that has compression straps at the top or bottom of the pack. If they are on the side of the pack, then you will have uneven weight distribution with you’re sleeping bag strapped in and your backpack’s shoulder straps won’t feel comfortable.
Use Bungee Cords
If you don’t have any free straps on your backpack or no straps on your sleeping bag sack, then you can always use bungee cords to strap your sleeping bag onto your pack. Just attach one end of the cord to a webbing loop and then wrap it around the pack and sleeping bag multiple times, until you feel it’s tight enough. Lastly, attach the end of the cord to a loop on the other side of the pack.
Use the Pack’s Gear Loops or Daisy Chains
Daisy chain webbing loops are used to attach extra gear if needed. This can also be used to attach a sleeping bag, but preferably one that is in a stuff sack with straps. The adjustable straps on a stuff sack can be attached to your pack’s gear loops. Make sure the stuff sack straps are pulled tight and are firmly pressed up against the pack to prevent the bag from swinging.
Use Tie Points on the Bottom for an External Frame Pack

By using tie points and their respective straps located at the bottom of an external frame pack, you can slide in a sleeping bag with ease and tighten it well. Some internal frame packs do come with tie points but without straps. Same with this method, make sure the straps are tightened properly to prevent any swinging or potential fall of the sleeping bag.
Sleeping Bag Molle Attachment

Molle backpack straps and buckles can be of great help to build your own gear attachment system. To secure a sleeping bag onto your pack, simply place your sleeping bag against your pack, wrap the molle attachment strap around the bag tightly, and send it through the buckle. You can use these straps to secure the sleeping bag wherever you want on the pack, top or bottom.